This is a Sponsored post written by me on behalf of Walmart for SocialSpark. All opinions are 100% mine.
Have you seen the amazing products that you can make from Duck Tape®? Purses, book covers, even prom dresses to name a few. It seems like there is no limit when it comes to this amazing product.
Today I would like to share a tutorial to make your very own Duck Tape® Pencil Bag.

Required Materials:
- Zipper type plastic bag (I used gallon sized)
- Your choice Duck Tape®
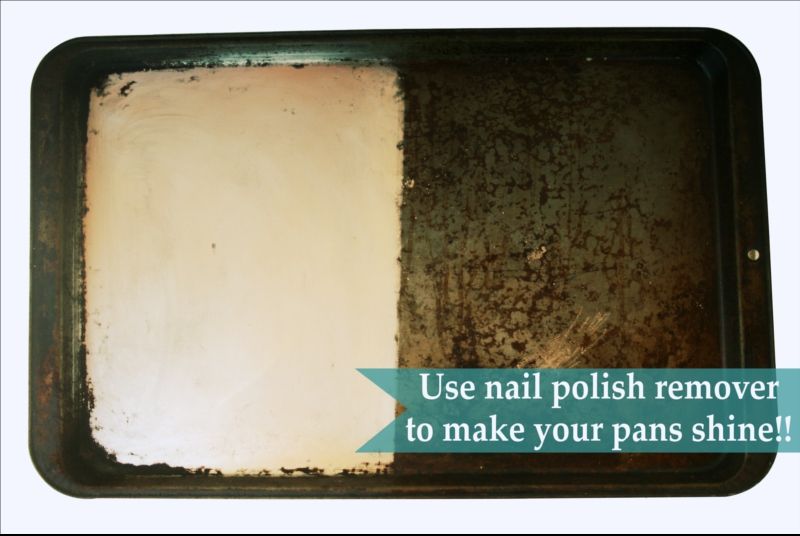
If there is any writing or symbol on your plastic bag you will want to remove it. In order to do this just soak the end of a paper towel in nial polish remover and then wipe the lable off.

Now, depending on how large your bag is, you will want to cut the end of your bag off so that it fits inside your binder.

Then tape the end that you just cut with a long strip of Duck Tape®.

Now cover one side of the bag with Duck Tape®. The ends don't have to be perfectly even with the sides of the bag since we will be covering them up anyway.

The last strip of Duck Tape® will wrap around the end, stopping just before the zipper closure on the bag.

On the opposite side of the bag, add a strip of Duck Tape® along each side wrapping it around the edge to cover up the ends of your Duck Tape® strips on the other side of the bag. Then do the same with the top of the bag, wrapping the tape over the edge but not covering up the zipper closure.

Using a contrasting color, make a "frame" around the window of your bag.

Punch holes with a hole punch then place it in your binder.
Duck Tape® is seriously the best thing ever. It comes in a wide variety of colors, as well as many popular t.v. and movie characters, allowing you (or your kids) to transform any item into something personal and unique. With kids, it is so important for the to express themselves and what better way to do it than with Duck Tape®. And with so many new school supplies that they will want to personalize, Duck Tape® is a must for your back to school shopping list.
What I love about this product:
- It is strong and very durable. Although I have not tested it yet, I'm pretty sure that this bag will make it through the school year with my kids.
- It comes in a LARGE variety of colors. Duck Tape® comes in every color of the rainbow and then some. They even have gold, silver, flowers, animal prints, dozens of popular characters and many more.
- The cost is reasonable. I paid $3.95* for the solid color rolls and you get 20 yards of tape. The non-solid rolls are only 10 yards and cost $5.95*. Can you imagine how many projects you can do with 10 yards of Duck Tape®?
- I can buy Duck Tape at Walmart. I don't have to make extra trips to any craft stores or other specialty stores.
- It's made in USA. With so many companies outsourcing their products I think that it is important to support our country and buy product made in our country.
- It's not see through. I've used other patterned tape for projects in the past and you could see through the tape. So if I was taping over something with writing or a symbol I would cover it with white paper first. Duck Tape® is thicker so you can't see through it. You don't have to waste time coving up projects before you tape them.
*These were the prices for my local Walmart. Prices may vary depending on location.
If you would like more inspiration from Duck Tape® you can follow them @TheDuckBrand for tons of fabulous ideas.
And now for the best part....Would you like to make your own Duck Tape® creations? Duck Tape® is giving one luck reader a $100 Walmart gift card!!
Contest Details:
- To enter all you have to do is leave a comment on this blog post stating what kind of Duck Tape® back to school themed craft you would make if you won the gift card.
- Contest will end Friday August 30th
- Winners will be announced Saturday August 31st on DIY Home Sweet Home.
GOOD LUCK!!


.JPG)